
 Save
Save
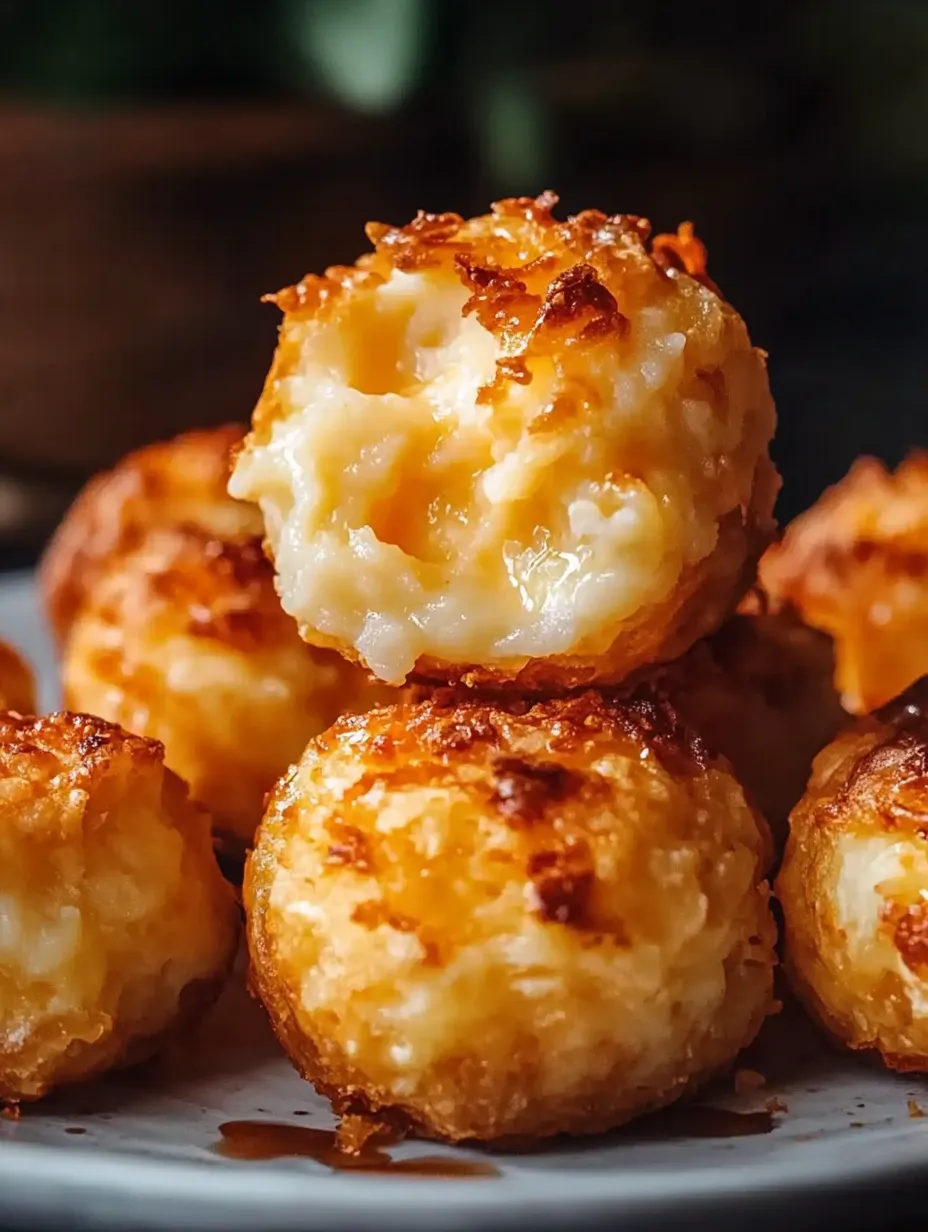
This smart way to reuse mashed potatoes turns yesterday's leftover side into today's main event. These tasty potato puffs have become what I'm known for at gatherings because they're always gone in minutes.
I first made these trying to save holiday leftovers from the trash, and now my family purposely makes too many mashed potatoes just so we can whip up these cheese puffs the next day.
Ingredients
- Leftover chilled mashed potatoes: work way better than warm ones since they keep their shape during mixing and cooking
- Grated cheese: creates those yummy melty spots, try something that melts well like sharp cheddar
- All-Purpose flour: works as the glue that holds everything in place
- Parmesan cheese: gives that rich savory kick that makes the whole thing taste better
- Chopped chives: add a light onion taste that balances out the heavy parts
- Sour cream: brings a nice zip and helps make the texture super fluffy
- Eggs: keep everything stuck together and help them puff up nicely in the oven
How To Make Them
- Get Your Stuff Ready:
- Heat your oven to 400°F and wait until it's fully hot. Spray your muffin tin with cooking spray or rub with butter, making sure to coat the sides too so nothing sticks when they're done.
- Mix Your Wet Stuff:
- Grab a big bowl and whisk eggs with sour cream until they're totally smooth with no streaks. This makes everything creamy, so take about a minute to do this right.
- Throw In The Tasty Bits:
- Now add your grated cheese, Parmesan and chives to the egg mix. Make sure your cheese isn't cold from the fridge, and cut those chives really small so their flavor gets everywhere.
- Add Your Potatoes:
- Fold in the cold mashed potatoes with a rubber spatula. Just scoop from the bottom to top about 10-12 times. Don't overmix or you'll lose all the fluffiness.
- Put Them In The Tin:
- Use an ice cream scoop to drop the mix into your muffin tin, filling each cup about 3/4 full. Just smooth the tops a bit but don't push down - they need room to grow.
- Bake Until Done:
- Put the tin on the middle rack and bake for 20-25 minutes. Keep an eye on them after 18 minutes. You want the tops nice and golden brown. They should feel set but still a little soft when you touch them.
- Cool Then Eat:
- Let them sit in the tin for 5 minutes after baking. This helps them firm up. Then run a knife around the edges and pop them out to serve while they're still warm.
My special trick is adding a bit of smoked paprika to the mix. I actually did this by mistake when cooking for my wife's parents, but they loved it so much that we now always put it in our family version.
Keeping Them Fresh
These cheese puffs stay good for quite a while if you store them right. After they've cooled down completely, put them in a container with a tight lid and line it with paper towels to soak up extra moisture. They'll last in your fridge for about 4 days. If you want to keep them longer, freeze them on a baking sheet first, then once they're frozen solid, toss them in a freezer bag. This way they won't stick together and you can grab just a few when you want them.
Different Flavors To Try
Once you know the basic recipe, you can play around with all kinds of flavors. Try mixing in some crunchy bacon bits and green onions for a loaded baked potato feel. For something fancier, add sweet caramelized onions and Gruyère cheese. If you like heat, throw in some chopped jalapeños and pepper jack. My favorite combo is roasted garlic and rosemary - it smells amazing while baking and tastes great with any roasted meat.
What To Eat Them With
These puffs are great on their own as a snack, but they really shine as part of a full meal. Serve them with chicken or steak instead of regular mashed potatoes for something more fun and interesting. For brunch, try them with a simple green salad with vinaigrette dressing - the tangy dressing cuts through their richness. At big family dinners, put them in the bread basket as a surprise instead of plain dinner rolls.

Frequently Asked Cooking Questions
- → Can I fix these potato cheese puffs before I need them?
Sure thing! You can mix everything up to a day ahead and keep it covered in the fridge. You can also bake them completely, let them cool down, and store in the fridge for up to 3 days. Just warm them back up in a 350°F oven for about 10-15 minutes until they're hot again.
- → What goes well with these mashed potato cheese puffs?
These handy puffs taste great with roast meat, grilled chicken, or fish dishes. They're also perfect as snacks with dips like sour cream, garlic mayo, or tomato sauce. For a full meal, add a green salad or some roasted veggies on the side.
- → How do I stop my potato puffs from getting stuck in the pan?
Don't forget to really coat the muffin tin with cooking spray or butter. For even better results, you can put little rounds of parchment paper in each cup or use silicone muffin liners. Let the puffs cool a bit before you try taking them out of the tin.
- → Can I freeze these potato cheese puffs?
You bet! After they're baked and totally cooled, put them on a baking sheet so they aren't touching and freeze them solid. Then move them to a sealed container or freezer bag and they'll keep for up to 3 months. When you want them, heat from frozen in a 375°F oven for about 15-20 minutes until they're hot throughout.
- → Which potatoes should I use for these cheese puffs?
Starchy types like Russets or Yukon Golds work best since they make fluffier puffs. If you're using leftover mashed potatoes, ones made with butter and milk will taste richer, but pretty much any mashed potatoes will do as long as they aren't too wet.
- → How can I make these puffs taste even better?
Bump up the flavor by mixing in roasted garlic, cooked-down onions, crispy bacon pieces, or different herbs like thyme, rosemary, or dill. You can also try different cheeses—smoky Gouda, spicy pepper jack, or crumbled blue cheese can really change things up.