
 Save
Save
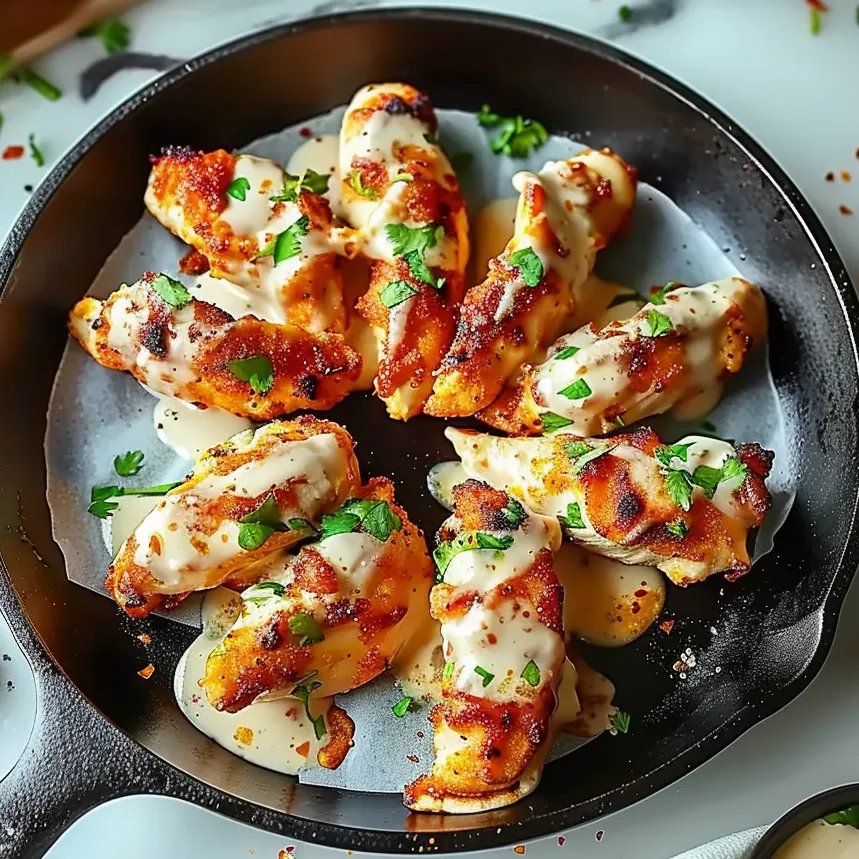
This juicy chicken wrap has been my weeknight dinner savior when I need something hearty but quick that pleases everyone at the table. The combination of garlic-infused chicken and melted cheese wrapped in a warm tortilla delivers restaurant-quality flavor with minimal effort.
I first made these wraps during a busy holiday season when we needed something substantial between festive meals. Now my family requests them nearly every week, especially on movie nights when we want something we can eat with our hands.
Ingredients
- Chicken breasts the star protein that soaks up all the delicious flavors and provides satisfying texture
- Olive oil ensures the chicken cooks evenly without sticking to the pan
- Garlic powder provides that classic savory flavor throughout the chicken
- Onion powder adds depth and mild sweetness without the texture of fresh onions
- Dried oregano and basil bring an Italian herb profile that complements the cheeses perfectly
- Mozzarella cheese creates that stretchy, melty texture everyone loves in a wrap
- Parmesan cheese delivers a salty umami punch that elevates the entire dish
- Flour tortillas look for the large size to properly contain all the fillings
- Sour cream adds creamy tanginess that balances the rich cheese
- Fresh parsley brightens the entire dish with color and fresh flavor
- Butter creates richness and helps crisp the exterior of the wraps
Step-by-Step Instructions
- Prepare the skillet
- Heat a large skillet over medium heat allowing it to fully warm up for even cooking. A well-heated skillet ensures your chicken will sear properly rather than steam.
- Oil the pan
- Add the olive oil to the skillet and allow it to warm for about 1 minute until it shimmers slightly. This step prevents the chicken from sticking and aids in even browning.
- Cook the chicken
- Place the chicken breasts in the skillet cooking them for about 6 to 7 minutes per side. Watch for a golden crust to form before flipping. The chicken is done when it reaches an internal temperature of 165°F which ensures safety while maintaining juiciness.
- Prepare the seasoning
- While the chicken cooks combine garlic powder onion powder dried oregano dried basil salt and black pepper in a small bowl. Mixing the seasonings ahead ensures they distribute evenly throughout the dish.
- Rest the chicken
- Once fully cooked remove the chicken from the skillet and set aside on a plate. This resting period allows the juices to redistribute throughout the meat ensuring moistness.
- Prepare the pan
- Add butter to the same skillet and let it melt completely swirling to coat the surface. The butter adds richness and builds on the flavors already in the pan from cooking the chicken.
- Shred the chicken
- Using two forks pull the chicken apart into bite sized shreds. Smaller pieces ensure better distribution throughout the wrap and make eating neater.
- Season the chicken
- Return the shredded chicken to the skillet with the melted butter then sprinkle with the prepared seasoning mix. Stir thoroughly to coat every piece with flavorful spices.
- Add cheese
- Incorporate both the mozzarella and Parmesan cheeses into the chicken stirring continuously until completely melted. The heat should be medium low to prevent the cheese from burning while ensuring it melts smoothly.
- Warm the tortillas
- Place each tortilla briefly in the skillet about 30 seconds per side until they become pliable and slightly golden. Warming activates the gluten in the tortillas making them more flexible and less likely to tear when rolling.
- Assemble the wraps
- Lay each warmed tortilla on a clean surface and spread a thin layer of sour cream down the middle. This creates a creamy base that helps the filling adhere.
- Add filling
- Distribute the cheesy chicken mixture evenly among the tortillas making sure not to overfill which could cause tearing.
- Add freshness
- Sprinkle fresh parsley over each portion of chicken for brightness and visual appeal.
- Roll the wraps
- Carefully fold in the sides of each tortilla then roll from the bottom up to create a secure wrap. Tuck the sides in firmly as you roll to keep the filling contained.
- Crisp the wraps
- Return the assembled wraps to the skillet seam side down and cook for 1 to 2 minutes per side until golden and crispy. Apply gentle pressure with a spatula to ensure even contact with the pan.
- Serve
- Slice the finished wraps diagonally and serve immediately while the cheese is still melted and the exterior is crisp.

The dried herbs in this recipe are my secret weapon. While fresh herbs are wonderful dried oregano and basil actually work better here because they infuse the oil and butter with concentrated flavor. My grandmother taught me this trick years ago and I now keep a well stocked herb pantry specifically for dishes like this.
Cheese Variations
Cheese selection can dramatically change the character of these wraps. While mozzarella provides the classic melt factor try substituting pepper jack for a spicy kick or provolone for a more sophisticated flavor profile. For a truly indulgent experience add a small amount of cream cheese to the mixture before rolling it creates pockets of creamy richness throughout the wrap.
The key to perfect cheese incorporation is temperature control. If your skillet is too hot the cheese will separate and become oily rather than creamy. Keep your heat at medium low when adding the cheese and stir constantly to achieve that smooth velvety texture that makes these wraps irresistible.
Make-Ahead Options
These wraps excel as make ahead meals. You can prepare the cheesy chicken filling up to three days in advance and store it refrigerated in an airtight container. When ready to serve simply reheat the filling in a skillet add a splash of water if it seems dry and proceed with assembly.
For busy families I recommend preparing a double batch on weekend meal prep days. The filling freezes beautifully for up to two months. Thaw overnight in the refrigerator before reheating gently in a skillet with a tablespoon of butter to refresh the flavors.
Serving Suggestions
These wraps stand perfectly on their own but pairing them with complementary sides elevates the meal. A simple green salad dressed with lemon vinaigrette provides refreshing contrast to the rich wraps. For a heartier option roasted sweet potato wedges seasoned with smoked paprika make an excellent accompaniment.
For entertaining consider cutting the finished wraps into pinwheels secured with toothpicks for an impressive appetizer. Serve alongside a cool cilantro lime dipping sauce to balance the warm cheesy flavors of the wraps.
Pro Tips
Allow the chicken to rest for at least 5 minutes before shredding to keep it juicy and tender throughout the cooking process.
Use the same skillet for all cooking steps to build layers of flavor as ingredients pick up residual seasonings from the pan.
For extra crispy wraps brush the outside of each tortilla with a small amount of butter before the final toasting step in the skillet.
Frequently Asked Cooking Questions
- → Can I make these wraps ahead of time?
Yes, you can prepare the cheesy chicken filling ahead of time and store it in the refrigerator for up to 2 days. When ready to serve, reheat the filling, assemble the wraps with fresh tortillas, and crisp them in a skillet.
- → What can I serve with these chicken wraps?
These wraps pair well with a simple green salad, roasted vegetables, sweet potato fries, or a light soup. For a more casual meal, serve with tortilla chips and fresh salsa or guacamole.
- → Can I use leftover rotisserie chicken?
Absolutely! Leftover rotisserie chicken works perfectly in this dish. Simply shred about 2-3 cups of chicken, warm it in the skillet with butter, and proceed with adding the seasonings and cheese as directed.
- → How can I make these wraps healthier?
For a lighter version, use whole wheat tortillas, reduced-fat cheese, Greek yogurt instead of sour cream, and add extra vegetables like spinach, diced bell peppers, or shredded carrots to the filling.
- → Can these wraps be frozen?
Yes, you can freeze the assembled wraps before the final crisping step. Wrap each one tightly in foil and freeze for up to 1 month. To reheat, unwrap and cook in a skillet until heated through and crispy on both sides.
- → What other cheeses work well in these wraps?
While mozzarella and Parmesan create a classic flavor, you can substitute with cheddar, Monterey Jack, provolone, or pepper jack for different flavor profiles. A Mexican cheese blend also works wonderfully.