
 Save
Save
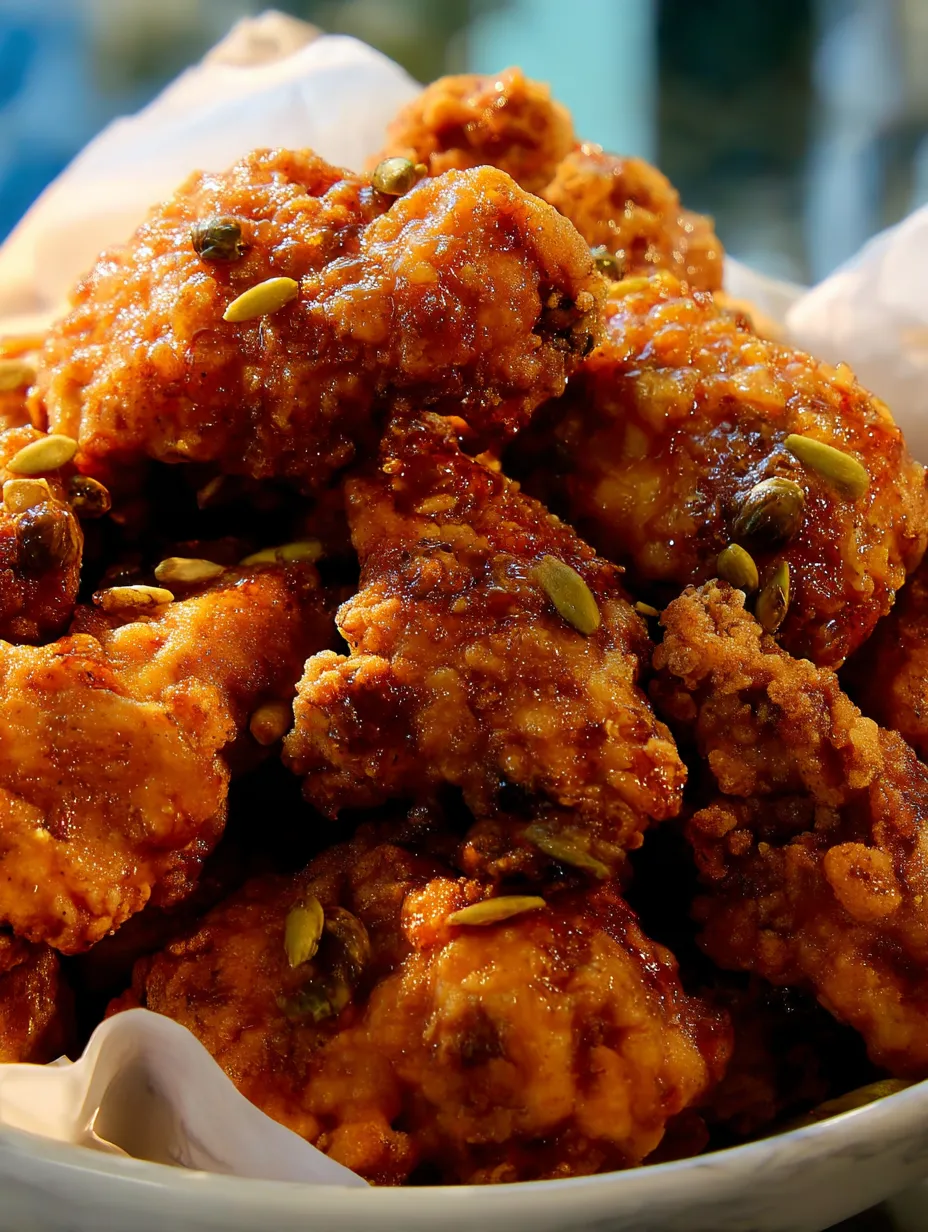
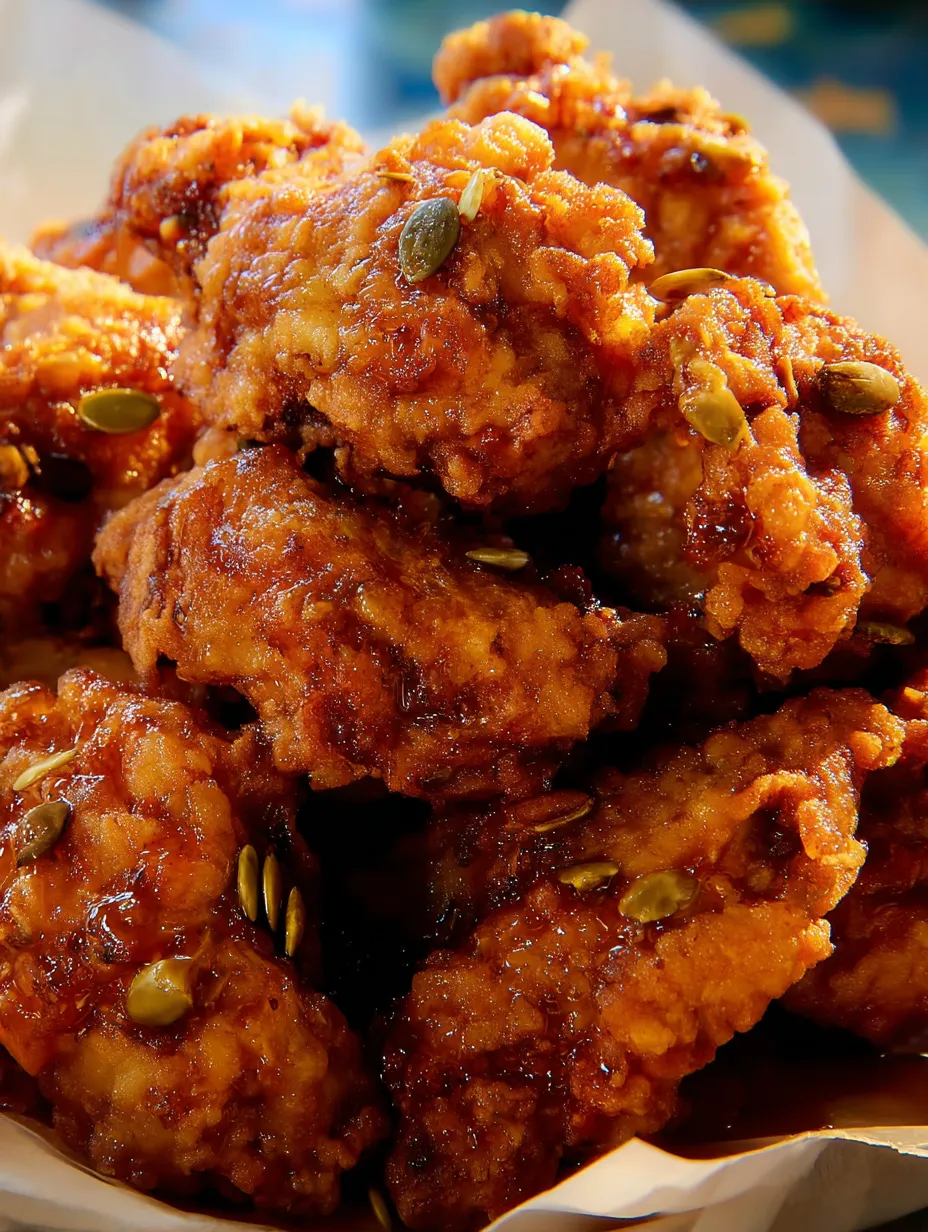
This Korean-style honey butter fried chicken brings together super crunchy outer layers with moist, succulent centers, all wrapped in a rich, sweet, buttery glaze that'll have you coming back for seconds.
I whipped this up during a family movie evening, and it vanished quicker than any delivery we've gotten. Now my teens beg for it every week, saying it beats their downtown Korean chicken joint hands down.
Ingredients
For the Chicken Marinade
- 1 pound chicken tenders: around 8-10 pieces. Go for fresh ones instead of frozen for extra juiciness
- 1 teaspoon kosher salt: to flavor the meat thoroughly
- ½ teaspoon white pepper: gives subtle heat without dark spots
- ½ teaspoon black pepper: adds classic pepper taste and look
- ½ teaspoon garlic powder: works flavor into the chicken
- ½ teaspoon onion powder: creates richness without chunky bits
- ½ teaspoon ginger powder: adds warmth and Asian flavor hints
- ¼ teaspoon cayenne pepper: tweak this based on how spicy you like it
For the Seasoned Flour
- 2 cups all purpose flour: forms the base for your crunchy shell
- 1 tablespoon kosher salt: makes sure the coating tastes great
- 1 tablespoon white pepper: adds kick without changing the light color
- 1 teaspoon black pepper: brings familiar pepper punch and tiny flecks
- 1 teaspoon garlic powder: boosts savory flavor in every bite
- 1 teaspoon onion powder: works with garlic for rounded taste
For the Wet Batter
- ½ cup all purpose flour: makes the sticky middle layer
- 1 large egg: helps everything stick together nicely
- 1 cup ice cold sparkling water: bubbles make the coating extra light and crispy
For the Honey Butter Sauce
- 4 tablespoons unsalted butter: creates the silky sauce foundation
- 2 tablespoons honey: try local honey for better flavor depth
- 2 tablespoons granulated sugar: works against the salty elements
- 2 tablespoons soy sauce: brings depth and salt to the mix
Additional Items
- 1 cup all purpose flour: for the first dusty layer that helps everything stick
- Neutral oil for frying: pick one that can handle heat like peanut or canola
Step-by-Step Instructions
- Season the Chicken:
- Mix chicken tenders with kosher salt, white pepper, black pepper, garlic powder, onion powder, ginger powder, and cayenne in a bowl. Rub the spices all over the chicken with your hands to spread flavors evenly. Let it sit in the fridge for at least 30 minutes, though leaving it overnight makes it taste way better.
- Prepare the Dredging Stations:
- Set up three spots in a row. First, put 1 cup of plain flour in a bowl. Second, make your wet mix by mixing ½ cup flour, egg, and ice cold sparkling water until it's smooth with no lumps. Third, combine 2 cups flour with kosher salt, white pepper, black pepper, garlic powder, and onion powder in a big bowl for your seasoned flour.
- Create the Texture Secret:
- Sprinkle a tablespoon of sparkling water into your seasoned flour. Use your fingers to gently mix it in, making small clumps. These little chunks are the chef's trick for those amazing crispy bits on the finished chicken that everyone loves to munch on.
- Coat the Chicken:
- Take each tender through all three stations. First roll in plain flour and shake off extra. Then dunk in wet batter, letting excess drip away. Finally, press hard into the seasoned flour to get a thick coating with lots of texture. Place each piece on a tray without touching others.
- Rest Before Frying:
- Let the coated chicken sit for 10 minutes while your oil heats up. This waiting step helps the coating stick to the chicken so it won't fall off during frying and makes sure it'll be super crunchy.
- First Fry:
- Heat about 2 inches of neutral oil in a heavy pot to 350°F exactly. Working with small groups of 3-4 pieces, carefully put tenders into the hot oil, keeping the temperature steady. Cook for 4-5 minutes, turning now and then, until coating turns light gold. Move to a wire rack over a baking sheet, not paper towels which make things soggy.
- Second Fry for Ultimate Crispiness:
- Bring oil back to 350°F and fry each tender again for 1-2 more minutes until deep gold and super crunchy. This double-fry trick is key for getting that special Korean fried chicken texture. Sprinkle with a bit of salt right away while still hot to bring out flavors.
- Create the Honey Butter Sauce:
- In a pan over medium heat, melt butter all the way. Add honey, sugar, and soy sauce, stirring all the time so it doesn't burn. Cook for 1-2 minutes until sauce gets thick enough to coat a spoon with a shiny finish.
- Apply the Sauce:
- For maximum crunch, brush the sauce over the chicken. For more flavor coverage, quickly toss the chicken in the sauce. Work fast here since the longer chicken sits in sauce, the more crunchiness you'll trade for flavor soaking.
The honey-butter combo might seem Western, but this dish actually comes from Korean honey butter chicken that became super popular across South Korea around 2015. The first time I cooked it, my Korean neighbor came knocking to ask what smelled so good. She ended up joining us for dinner!
Make-Ahead Options
While fresh fried chicken tastes best, you can get some parts ready early to save time. Soak the chicken overnight for extra flavor. You can even do the first fry up to 2 hours before serving, then do the second fry right before eating. The sauce keeps in the fridge for up to 3 days and just needs gentle warming before use.
Perfect Pairings
This honey butter chicken goes great with cool sides that balance its richness. Try serving it with simple cucumber slices tossed in rice vinegar, or Korean pickles like kimchi. For a full meal, add some steamed rice to soak up the yummy sauce, or wrap chicken pieces in lettuce leaves with a dab of gochujang for a Korean twist.
Troubleshooting Tips
If your coating falls off during cooking, your oil's probably too cool. Always check with a thermometer to keep it at 350°F. If your chicken browns too fast but stays raw inside, your oil's too hot. For the crunchiest results, don't overcrowd the pan when frying. Working in small batches keeps oil temperature right and makes everything crispy.
Frequently Asked Cooking Questions
- → Why does this recipe use double-frying technique?
Frying twice is key to getting that super crunchy outside that Korean fried chicken is known for. The first time cooks the chicken through, and the second time at the same heat makes that extra crunchy layer that stays crisp even after you add the sauce.
- → Can I make this chicken spicier?
You bet! Want more kick? Toss in another ¼ teaspoon of cayenne to your marinade, or mix 1 tablespoon of gochujang into your honey butter sauce for a genuine Korean-style heat.
- → Why use sparkling water in the batter?
The cold bubbly water makes tiny air pockets in the batter that grow when they hit hot oil, giving you a lighter, crispier coating. This trick helps get that special crunchy feel that makes this chicken so good.
- → What's the purpose of creating clumps in the seasoned flour?
Adding a bit of liquid to your seasoned flour makes small clumps that stick to the chicken during coating. These clumps are what create those extra crunchy, rough bits on the outside that give amazing texture and crunch after frying.
- → How do I keep the chicken crispy after adding the sauce?
For the best crunch, you can brush the sauce lightly on the chicken instead of tossing it, or if you do toss it, do it really quick right before you serve it. Frying twice helps keep it crunchy even with sauce, but eating it right away gives you the best texture.
- → What oils work best for frying this chicken?
Plain oils that can take high heat work best, like vegetable, canola, or peanut oil. These oils can handle the hot temperature needed (350°F) without adding weird flavors to your chicken, so the honey butter sauce and spices can really stand out.