
 Save
Save
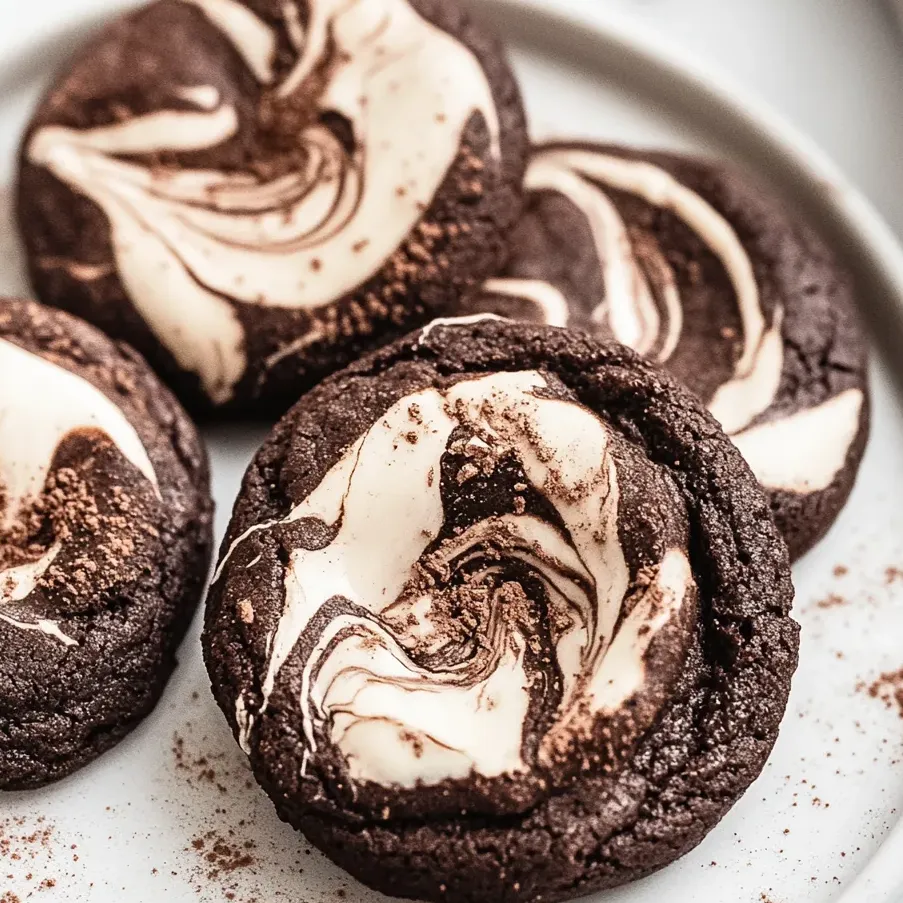
These rich chocolate marshmallow swirl cookies create the perfect balance between fudgy chocolate and gooey marshmallow in every bite. The contrast of textures between the soft cookie base and the sweet marshmallow swirls makes these treats irresistible to chocolate lovers of all ages.
I first made these cookies for my niece's birthday party and they disappeared faster than any other dessert. The kids called them "hot chocolate cookies" because they reminded them of hot cocoa topped with marshmallows.
Ingredients
- All purpose flour: provides the structure for these cookies while keeping them tender
- Unsweetened cocoa powder: delivers that intense chocolate flavor without being overly sweet; use Dutch processed for a deeper color
- Baking soda: helps the cookies rise just enough without becoming cakey
- Salt: balances the sweetness and enhances the chocolate flavor
- Unsalted butter: at room temperature creams perfectly with sugar for the ideal cookie texture
- Granulated sugar: provides sweetness and helps create those slightly crisp edges
- Large eggs: at room temperature bind everything together and add richness
- Vanilla extract: enhances both the chocolate and marshmallow flavors
- Marshmallow fluff: creates those beautiful swirls and adds a gooey sweetness
Step-by-Step Instructions
- Prepare the dry ingredients:
- Whisk together flour, cocoa powder, baking soda, and salt in a medium bowl until well combined. This ensures even distribution of leavening agents and prevents cocoa powder lumps in your finished cookies.
- Cream butter and sugar:
- Beat room temperature butter with granulated sugar for a full 3-4 minutes until the mixture becomes noticeably lighter in color and fluffy in texture. This crucial step incorporates air into the batter for proper cookie texture.
- Add wet ingredients:
- Beat in eggs one at a time, giving each egg about 30 seconds to fully incorporate before adding the next. Add vanilla extract and mix until just combined. The mixture should look smooth and glossy at this point.
- Combine wet and dry ingredients:
- Add the dry ingredients to your butter mixture gradually, mixing on low speed. Stop mixing as soon as the flour disappears to avoid developing gluten which would make tough cookies. The dough will be quite thick.
- Chill the dough:
- Cover the bowl with plastic wrap and refrigerate for at least one hour. This step prevents excessive spreading during baking and allows the flavors to meld together. The dough will also be less sticky and easier to handle.
- Shape and add marshmallow:
- Scoop chilled dough into balls and place them on parchment-lined baking sheets. Press an indent into each dough ball with your thumb or the back of a spoon, then fill with a teaspoon of marshmallow fluff. Use a toothpick to create pretty swirls in each cookie.
- Bake to perfection:
- Bake at 350°F for exactly 10-12 minutes. The cookies should look set around the edges but still slightly underdone in the center. For extra gooey marshmallow, add a small dollop halfway through baking time.
- Cool properly:
- Let the cookies rest on the baking sheet for 5 minutes before moving to a wire rack. This resting time allows the cookies to firm up enough to handle without breaking while still keeping that perfect soft center.
The cocoa powder is truly the star ingredient in these cookies. I discovered using a high-quality Dutch-processed cocoa makes a world of difference in the depth of flavor. My grandmother always said chocolate cookies should taste like a proper chocolate dessert, not just a brown sugar cookie, and these definitely deliver on that promise.
Make Ahead Options
These cookies work beautifully as a make-ahead dessert. You can prepare the dough up to three days in advance and keep it refrigerated. For longer storage, shape the dough into balls and freeze them on a baking sheet before transferring to a freezer bag. When ready to bake, simply place the frozen dough balls on your baking sheet, make the indent, add marshmallow fluff, and bake for 2-3 minutes longer than the recipe states. The cookies will taste just as fresh as if you made the dough that day.
Troubleshooting Marshmallow Swirls
Getting the perfect marshmallow swirl can be tricky at first. If your marshmallow fluff seems too runny, refrigerate it for 15-20 minutes before adding it to the cookies. This helps it maintain its shape better during baking. Another trick is to create a deeper indent in your cookie dough to contain the marshmallow better. For a more dramatic look, try using a combination of regular marshmallow fluff and a bit of colored marshmallow fluff swirled together. The marshmallow will spread during baking, so don't be concerned if it looks too contained before going into the oven.
Flavor Variations
While the classic chocolate and marshmallow combination is delicious, there are several ways to customize these cookies. Try adding a tablespoon of espresso powder to the dry ingredients for a mocha flavor that enhances the chocolate. For a minty twist, add 1/4 teaspoon of peppermint extract to the batter. You can also press a piece of chocolate into the center along with the marshmallow for an extra chocolatey surprise. During the holidays, I like to sprinkle crushed candy canes on top of the marshmallow swirl right after baking for a festive peppermint chocolate cookie.
Frequently Asked Cooking Questions
- → Can I use mini marshmallows instead of marshmallow fluff?
Yes, mini marshmallows can be used instead of marshmallow fluff, but they'll create a different texture. For a similar effect, press 2-3 mini marshmallows into each cookie before baking. They won't swirl as easily as fluff but will create pockets of gooey sweetness.
- → Why do I need to chill the dough?
Chilling the dough serves two important purposes: it makes the sticky dough easier to handle when forming cookies, and it prevents excessive spreading during baking. This helps maintain a thicker, chewier texture rather than thin, crispy cookies.
- → How do I know when the cookies are done baking?
The cookies are done when the edges are set but the centers still look slightly underbaked and soft, typically after 10-12 minutes. They'll continue cooking slightly on the hot baking sheet after removal from the oven. Remember that cookies with marshmallow will look even more underdone in the marshmallow areas.
- → Can I freeze these cookies?
Yes! You can freeze these cookies in two ways: freeze the unbaked dough balls (without marshmallow) and add the marshmallow when ready to bake, adding 1-2 minutes to the baking time. Or freeze completely baked and cooled cookies in an airtight container with parchment between layers for up to 3 months.
- → How do I prevent the marshmallow from sticking to everything?
To prevent marshmallow stickiness, allow cookies to cool completely on the baking sheet before attempting to move them. Using parchment paper or silicone baking mats is essential. If storing, place parchment between cookie layers. Lightly spraying your scoop or spoon with cooking spray before handling marshmallow fluff also helps.
- → Can I add chocolate chips to these cookies?
Absolutely! Fold in 1 cup of chocolate chips, chunks, or even white chocolate chips to the dough before chilling for extra chocolate flavor and texture. Semi-sweet or dark chocolate chips work particularly well with the marshmallow's sweetness to create a balanced flavor profile.