
 Save
Save
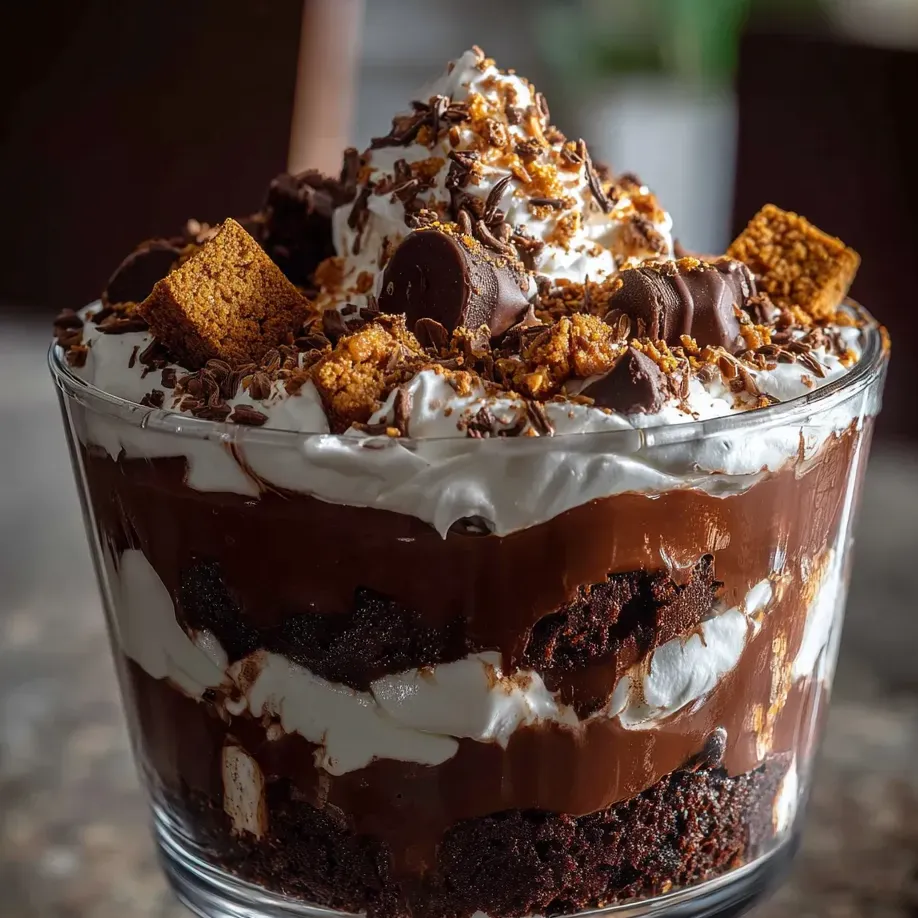
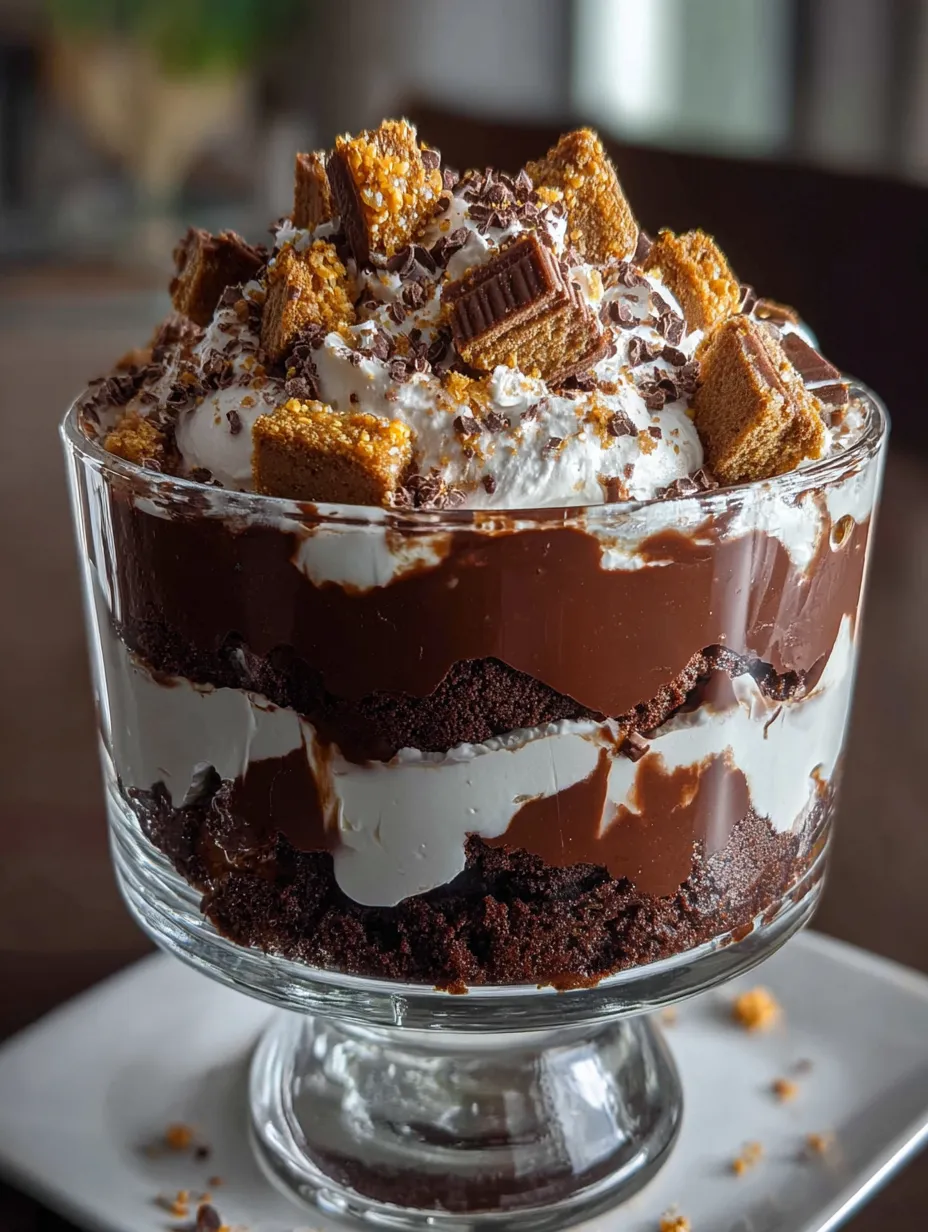
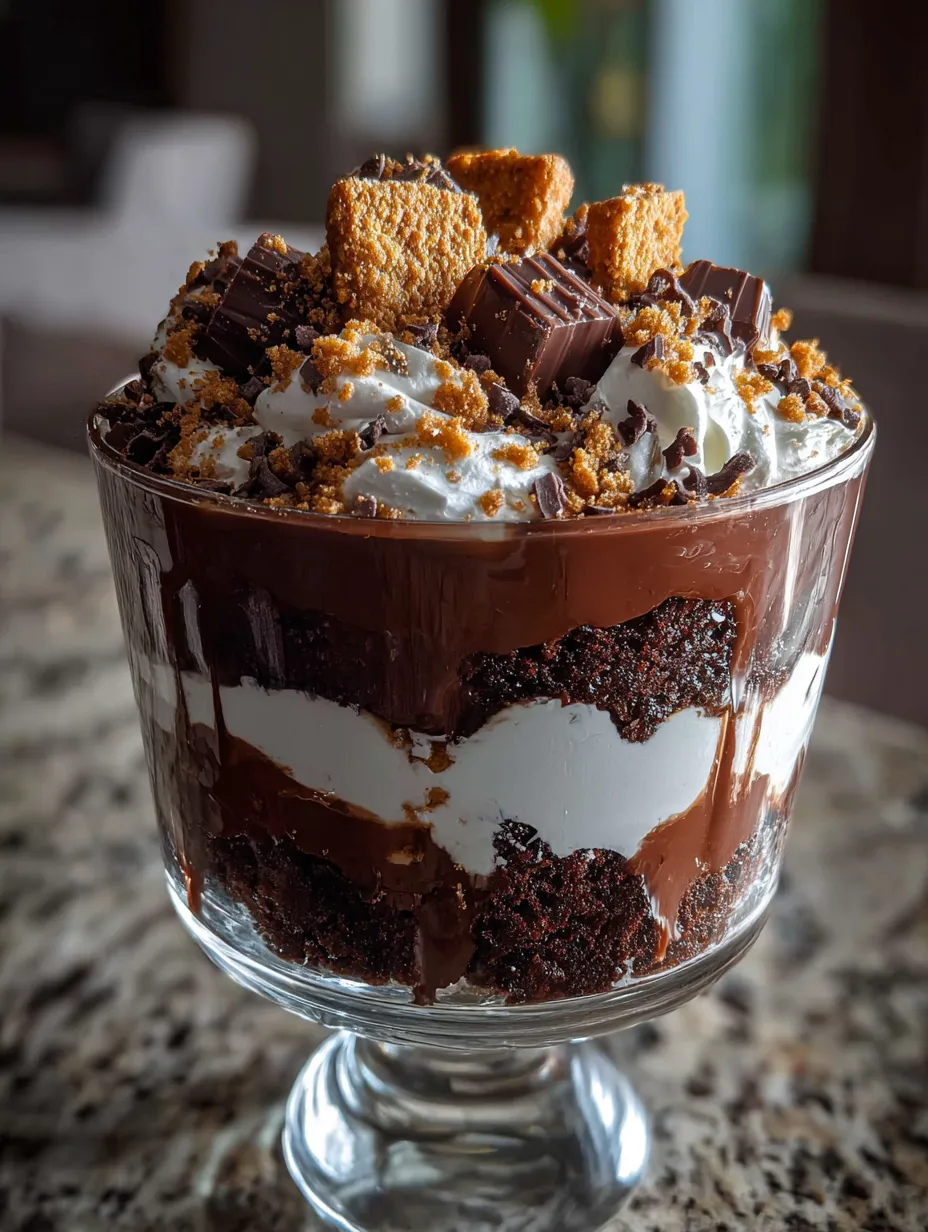
Layers of chocolate brownies, creamy pudding, and fluffy whipped cream come together for a stunning treat that's super easy to put together. With each layer, you've got a new fun bite. I love serving this at parties because it wows everyone and honestly takes almost no effort.
The first time I made this for friends on a Saturday night, it was gone so quick. Years later they still message me wanting to know how to make it!
Delicious Ingredients
- Chocolate pudding: rich and creamy use your favorite store-bought option or mix some up at home just make sure there's real cocoa in there
- Fudgy brownies: start with a chewy dense base for extra chocolate punch using high-quality cocoa makes it taste even better
- Chocolate chips: gives you yummy bits of texture try using a chopped chocolate bar or little chips for crunch
- Whipped cream: bring a light fluffy topping go classic with freshly whipped cream or a ready-made tub
- Chopped nuts (optional): add a crispy fancy touch pecans and walnuts both taste awesome here grab fresh nuts if you can
Simple Step by Steps
- Top It All Off
- Scatter a bunch of chocolate chips and those crunchy nuts over the final layer of whipped cream then cover the whole dish Chill it in the fridge for at least a couple hours so everything blends together nicely
- Repeat and Finish Layers
- Keep going with more brownies a layer of pudding then cream stack it up until you run out of goodies always end with whipped cream on top it's the best part
- Add the Cream
- Pipe or spoon on a generous cloud of whipped cream over the pudding Layer it smooth to keep it tidy
- Pile On the Pudding
- Ladle chocolate pudding in thick enough that you see the distinct layer Use a spoon to even it out
- Start With Brownies
- Pop your chopped brownies into the bottom of your clear bowl press them down gently so they're packed together
- Stir Up the Pudding
- If you're using instant just mix in cold milk and beat till it's creamy make sure to let it thicken all the way it's gotta set up before layering
- Slice Up the Brownies
- Either bake your favorite brownies or use a boxed one once cooled cut them into squares around an inch big so you get a bit in every scoop
I always look forward to the pudding layer the most It reminds me of my mom making extra so I could sneak a taste from the fridge while everyone waited for dessert to set up
Keeping It Fresh
Wrap it up snug with plastic and stash in the fridge It’s good for three days though the brownies will get softer The flavors meld together overnight so prepping this a day early is a win
Easy Ingredient Swaps
Switch in vanilla or caramel pudding for something different and peanut butter chips or toffee pieces instead of chocolate chips If you need dairy free try coconut whipped topping and the right dairy free pudding Always double-check labels for gluten free needs
How to Serve
Spoon into glasses for cute individual servings or pile it all in a big trifle bowl for major impact A drizzle of chocolate sauce or some berries looks awesome on top I like to bring it out after a cozy meal with comfort foods
Trifle Fun Facts
Trifles started out in England—layers of cake and custard and fruit all stacked up My all-chocolate twist comes from swapping out the fruit so you get even more chocolate in every bite My family can’t ever get enough!
Frequently Asked Cooking Questions
- → Is it possible to use a different pudding flavor?
Totally—vanilla or caramel pudding will switch up the taste if you don’t want chocolate.
- → What’s the best way to hand out servings?
Grab a spoon and fill up glasses or bowls with chilled scoops, making sure every helping has each layer.
- → Should I cool this dessert before eating?
Definitely put it in the fridge for at least 2 hours so it firms up—and tastes even better!
- → Can I pull this off using gluten-free brownies?
You sure can! Just pick out a gluten-free brownie mix or bake up your own batch.
- → Are nuts required on top?
Don’t want nuts? No worries. Pile on more chocolate chips, berries, or leave them out if that’s what you like.
- → How long can I keep extras in the fridge?
Stash leftovers in a tight container in your fridge and they’ll last up to three days.