
 Save
Save
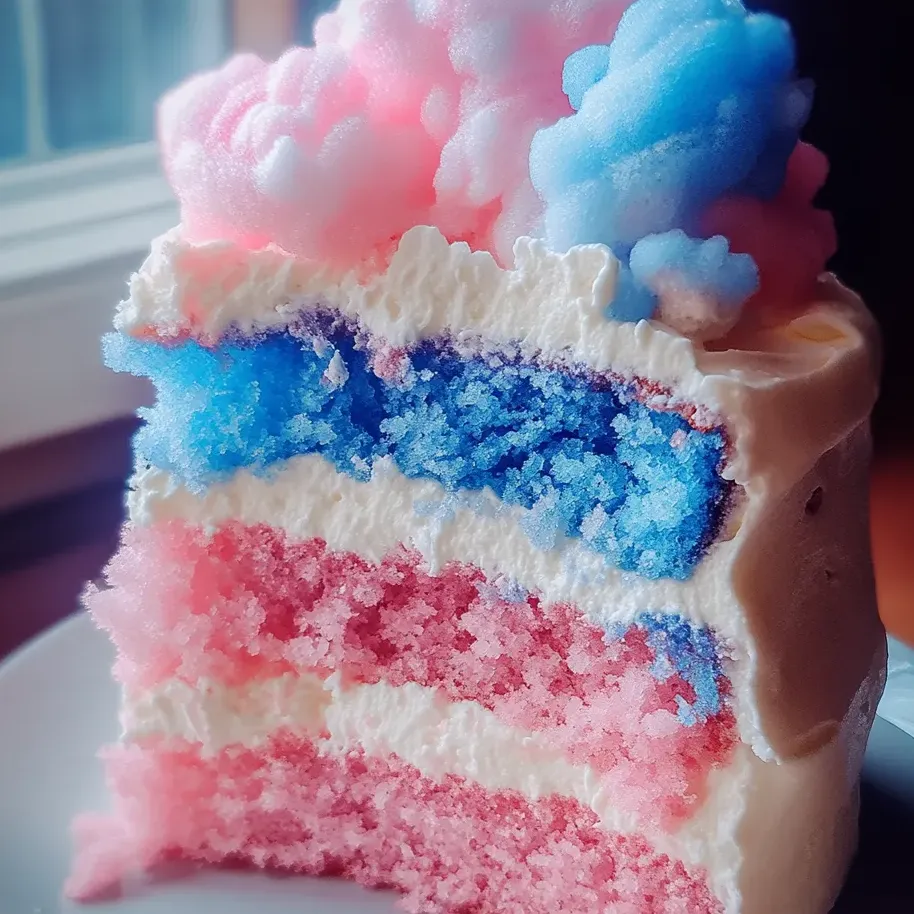
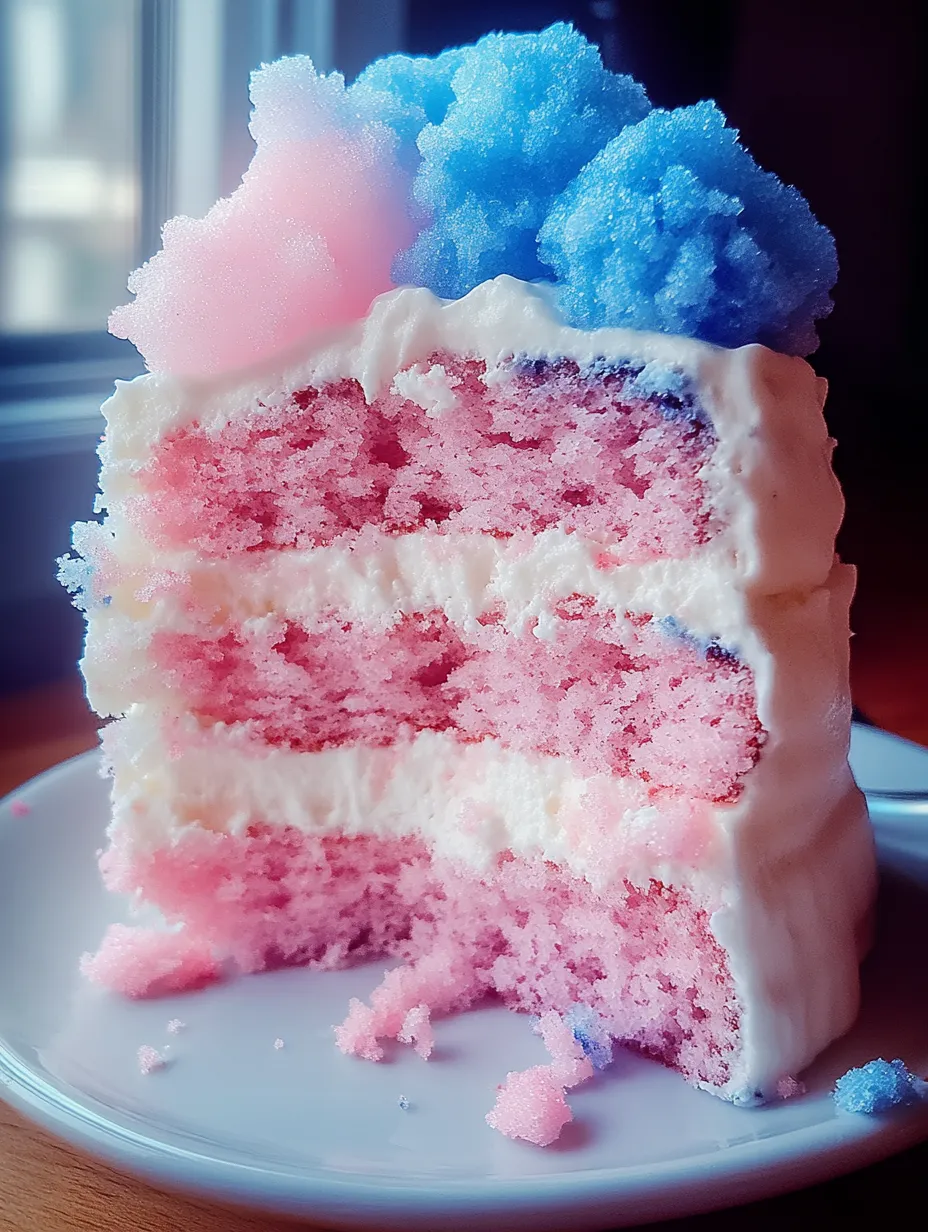
This cotton candy cake bursts with playful fairground energy in every mouthful. The layers are dreamy pastels with creamy icing that totally steals the show. Whip this up for birthday bashes or whenever you want to bring a wow factor to the party table—it's as tasty as it is pretty.
I once made this cake for my niece's party. The amazement on her face when pastel colors peeked through each slice was absolutely priceless. Now she asks for this treat every single time.
Playful Ingredients
- Sprinkles: jazz things up even more go for fun pastel shapes
- Cotton candy for garnish: makes the look extra special add it at the last second
- Heavy cream or milk: keeps the icing smooth and soft using regular milk is fine too
- Powdered sugar: makes the icing nice and fluffy always sift for no lumps
- Food coloring: get creative with pastels—gel works best for solid color
- Whole milk: keeps the cake moist and tender regular milk can swap in
- Cotton candy extract: brings the signature silly-sweet taste try to use a real baking brand if you can
- Vanilla extract: amps up the flavor and aroma use pure vanilla for the best results
- Large eggs: help make the cake fluffy and hold it together room temp is a must for smooth batter
- Granulated sugar: sweetens everything up evenly sift first for the smoothest mix
- Unsalted butter: gives that rich, creamy bite pick good quality for the perfect crumb
- Salt: evens out the sweetness fine salt blends in perfectly
- Baking powder: lifts the cake for a nice rise check it's fresh so the cake isn't flat
- All-purpose flour: makes a solid but fluffy cake base always use new flour for best texture
Pick ingredients that are fresh and smell right. Double-check those dates before you start for a cake that's as tasty as it looks.
Step-by-Step Instructions
- Decorate With Cotton Candy and Sprinkles:
- Ready to show off? Pop on clouds of cotton candy over the top and around the sides. Finish with sprinkles for extra fun. Decorate right before eating so the cotton candy stays fluffy.
- Assemble and Frost:
- Set down the first layer and scoop on some frosting. Stack the next layers on top, more frosting in between. Smother the outside in icing so it looks super smooth and covered.
- Whip the Frosting:
- Soften your butter and whip it in a big bowl. Toss in powdered sugar gradually—sift it as you go. Add heavy cream or milk as needed. Beat until you get a fluffy spread. Mix in vanilla and cotton candy flavor, color if you like.
- Cool the Cakes:
- Let baked layers chill for ten minutes in the pans before flipping onto a rack. Wait for them to be completely cool before you add icing or it’ll melt right off.
- Bake the Cakes:
- Spoon the tinted batters evenly into pans. Smooth the top and bake about 25–30 minutes—poke with a toothpick to check for crumbs. Filling each pan evenly gives nice layers.
- Color the Batter:
- Split batter into a couple bowls, one for each shade you want. Add your food coloring and gently stir to get those dreamy pastels.
- Alternate Adding Dry Ingredients and Milk:
- Add dry mix and milk to your bowl, a little at a time. Start and finish with flour mix. Stir gently—overmixing makes things dense instead of soft.
- Incorporate the Eggs and Extracts:
- Crack in the eggs one at a time, mixing while you go. Once they’re all mixed in, splash in your vanilla and cotton candy extracts so flavor’s everywhere.
- Cream the Butter and Sugar:
- Beat soft butter and sugar together until the mix looks pale and fluffy—use an electric mixer for about two or three minutes. This makes your cake nice and tender.
- Whisk the Dry Ingredients:
- Combine flour, baking powder, and salt in a mixing bowl. Mixing now keeps things even and fluffy later with no clumps.
- Prepare the Cake Pans:
- Get your oven hot at 175°C. Grease three round pans (20 cm) and stick parchment on the bottom so nothing sticks later.

Swirling food coloring with my niece is my favorite. We always hope for swirls when we peek into the oven. Tasting icing with her while we decorate makes baking together so much fun every single time.
Keeping It Fresh
Seal your cake in an airtight container on the counter for a couple days so it keeps soft. Only stick cotton candy decorations on right before serving—otherwise they'll collapse into the frosting. For longer storage pop it in the fridge but let it warm up before eating so the layers stay pillowy.
Swaps and Switches
No cotton candy extract? Use almond or raspberry for a cool twist. Gel coloring is tops for bright even color, but regular liquid food coloring works if that’s all you’ve got. You can use non-dairy milk instead of whole milk, though the cake might be a little less rich.
How to Serve
This showstopper makes any event brighter, like birthdays, baby showers, or big tea parties. Put a puff of cotton candy on each slice for full carnival vibes. Team it up with some sparkling lemonade or berry punch to make your dessert table sparkle.
The Sweet Story Behind It
This treat comes straight from childhood memories of sticky fairground fingers and laughing with siblings. Pouring those pastel batters into pans reminds me of classic blue and pink clouds on carnival sticks. Whenever I cut into this cake, I think of carousel rides and that good old candy floss magic.
Frequently Asked Cooking Questions
- → What's the secret to getting super bright cake layers?
Split the batter into bowls and mix in your choice of food coloring (gel or liquid) by folding it in gently. Once your colors are blended, pour each into its own pan.
- → Can't find cotton candy extract? What else works?
Try almond or even raspberry extract instead. Both give your cake a unique twist that’s just as yummy.
- → How do I keep the cotton candy from melting or disappearing?
Wait until just before you serve to toss on the cotton candy and other toppings. If they touch frosting or sit in humidity, they’ll vanish pretty fast.
- → How can I make my cake layers look marbled?
Spoon the colored batters into pans, then use a knife or skewer to swirl them a bit before baking. It’ll make cool patterns without much effort.
- → Will this cake be okay sitting out?
Yes, just pop it in an airtight container and it keeps for about two days on the counter. Only add cotton candy right before slicing it up.