
 Save
Save
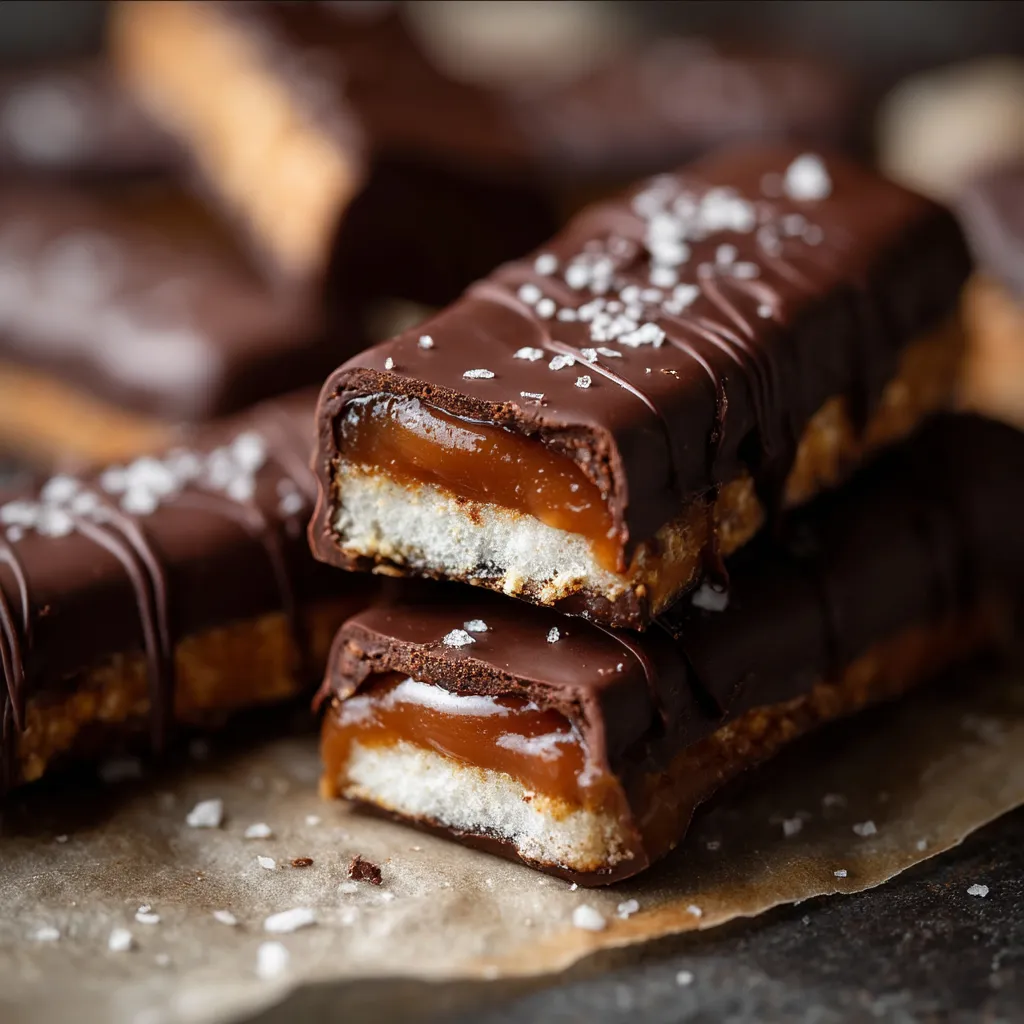
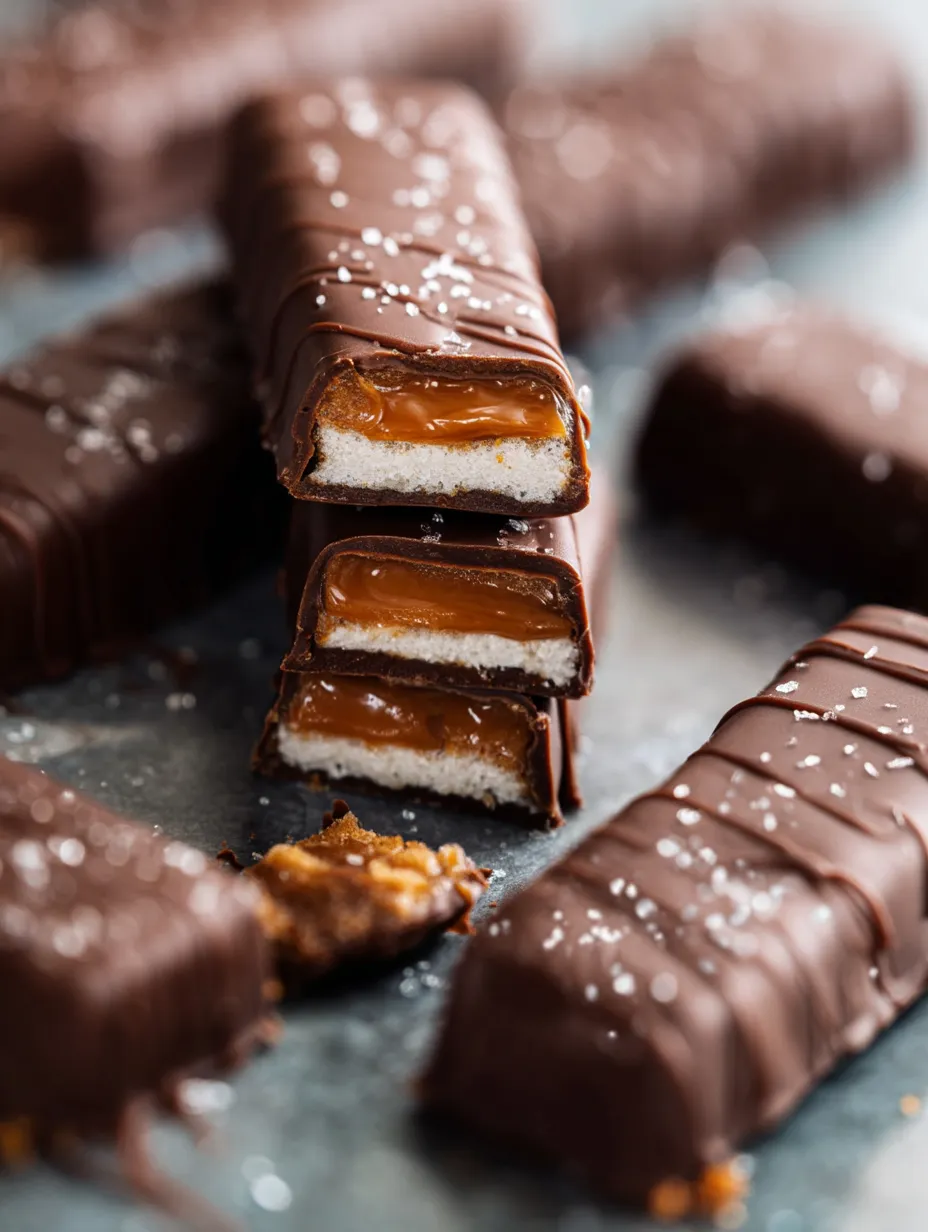
This homemade gluten-free Twix bar recipe transforms a guilty pleasure into a nutritious treat without sacrificing that classic chocolate-caramel-cookie combination we all crave. My kitchen experiments with healthier desserts led to this gem that satisfies sweet cravings while keeping ingredients wholesome.
I first created these bars when searching for a dessert my gluten-sensitive friend could enjoy at our monthly book club. They disappeared within minutes and now I receive special requests to bring them to every gathering.
Ingredients
- Almond flour: forms the perfect shortbread base with a buttery texture without wheat flour. Look for blanched fine almond flour for the smoothest result.
- Butter: provides that authentic shortbread richness. Use good quality grass-fed butter for best flavor.
- Maple syrup: sweetens naturally with complex flavors. Choose pure maple syrup not pancake syrup for best results.
- Vanilla extract: enhances all the flavors. A pure extract makes a noticeable difference.
- Creamy peanut butter: creates the caramel layer with amazing texture. Select natural peanut butter without added oils or sugar.
- Chocolate chips: deliver that classic coating. Dark chocolate chips with at least 70% cacao provide the richest flavor.
- Coconut oil: helps the chocolate coating achieve the perfect snap. Refined coconut oil works best if you prefer no coconut flavor.
Step-by-Step Instructions
- Prepare the pan:
- Preheat your oven to 350°F then line your baking dish with parchment paper leaving overhang on all sides. This simple step ensures your bars will release easily later without breaking.
- Create the shortbread:
- Combine almond flour, melted butter, maple syrup, vanilla, and salt in a bowl until the mixture resembles wet sand that holds together when pressed. Work the dough evenly into the pan using your fingertips or the bottom of a measuring cup to create a smooth compact layer.
- Bake the base:
- Place the pan in the center rack of your oven and bake for exactly 10 minutes for a softer cookie base or 12 minutes for a more crisp result. The edges should just begin to turn golden while the center remains pale. Allow to cool completely before adding the next layer.
- Mix the caramel filling:
- In a separate bowl, stir together peanut butter, maple syrup, vanilla, and almond flour until completely smooth and thickened. The almond flour helps stabilize the mixture so it sets properly.
- Layer and freeze:
- Spread the peanut butter caramel evenly over the cooled shortbread using an offset spatula for the smoothest finish. Place the entire pan in the freezer for at least one hour until the caramel layer feels firm to the touch.
- Prepare the chocolate coating:
- Create a double boiler by placing a heat-safe bowl over a pot of simmering water. Add chocolate chips and coconut oil, stirring constantly until completely melted and glossy. Alternatively, microwave in 30-second intervals, stirring between each until smooth.
- Cut and dip:
- Remove the chilled base from the freezer and use the parchment overhang to lift it onto a cutting board. With a sharp knife, cut into 16 even bars. Dip each bar completely in chocolate using two forks to maneuver, allowing excess to drip off before placing on a parchment-lined tray.
- Set the final bars:
- For a professional finish, drizzle remaining chocolate over the tops in a zigzag pattern and sprinkle with flaky sea salt if desired. Return to the freezer for 10 minutes until the chocolate sets completely with a satisfying snap.

The peanut butter caramel layer is what makes these bars truly special. My daughter once proclaimed these better than the original candy bars, which as a health-conscious mom felt like winning the lottery. Sometimes I add a tiny pinch of cinnamon to the shortbread layer for an unexpected warmth.
Storage Secrets
These homemade Twix bars require proper storage to maintain their perfect texture. Keep them in an airtight container in the refrigerator where they will last for up to two weeks with the shortbread remaining crisp and the caramel perfectly chewy. For longer storage, individual bars can be wrapped in parchment paper and stored in a freezer-safe container for up to three months. Let frozen bars thaw for about 10 minutes before enjoying for the best flavor and texture experience.
Clever Substitutions
The versatility of this recipe allows for numerous adaptations to suit dietary preferences and what you have on hand. Sunflower seed butter creates a delicious alternative for those with nut allergies. Coconut sugar can replace maple syrup in the shortbread base for a deeper caramel flavor. For a dairy-free version, use coconut oil instead of butter in the shortbread base. Those following keto diets can substitute the maple syrup with a monk fruit sweetener and use sugar-free chocolate chips for the coating.
Serving Suggestions
Transform these bars from simple snacks into elegant desserts with thoughtful presentation. Serve slightly chilled on a wooden board sprinkled with cacao nibs for a rustic dessert platter. For special occasions, place a single bar on a small plate with a dollop of coconut whipped cream and fresh berries. These bars pair wonderfully with afternoon coffee or tea, especially an earthy rooibos that complements the nutty flavors. For an indulgent treat, warm a bar for 10 seconds in the microwave and serve with a scoop of vanilla ice cream.
Frequently Asked Cooking Questions
- → Can I substitute the peanut butter in these Twix bars?
Absolutely! If you have allergies or preferences, you can substitute the peanut butter with almond butter, cashew butter, or sunflower seed butter for a nut-free option. Each alternative will provide a slightly different flavor profile while maintaining the creamy caramel-like texture.
- → How long do these homemade Twix bars last?
When stored in an airtight container, these bars will last up to 1 week in the refrigerator or up to 3 months in the freezer. The texture is actually best when slightly chilled, as it helps maintain the distinct layers and prevents the chocolate from melting.
- → Can I make these Twix bars vegan?
Yes! To make these vegan, substitute the butter with coconut oil or a plant-based butter alternative. Also ensure your chocolate chips are vegan (many dark chocolate varieties are naturally vegan, but always check the label).
- → What type of chocolate works best for the coating?
Semi-sweet or dark chocolate chips work best for the coating, providing a balanced flavor that complements the sweet caramel layer. If you prefer milk chocolate, that works too! For the best melting results, use high-quality chocolate chips or chopped chocolate bars rather than candy melts.
- → Why do my bars need to be frozen before dipping?
Freezing the layered bars before dipping them in chocolate is crucial for structural integrity. The cold temperature firms up both the shortbread base and the peanut butter layer, making them easier to handle and dip without falling apart. It also helps the chocolate coating set more quickly.
- → Are there any tips for a neater chocolate coating?
For a neater coating, use two forks to dip each bar into the chocolate, allowing excess to drip off. Tapping the fork gently on the side of the bowl helps remove excess chocolate. You can also use a chocolate dipping tool or simply drizzle the chocolate over the bars if full dipping seems challenging.